Contact List Application
Step - 1 : Creating ContactListDisplay Apex Class
1. Click File | New | Apex Class

2. Implement the Code as Follows

3. Click Save
Step - 2 : Creating ContactList Component
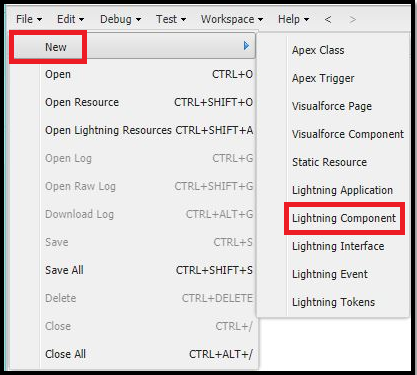
- In the Developer Console, click File | New |Lightning Component.
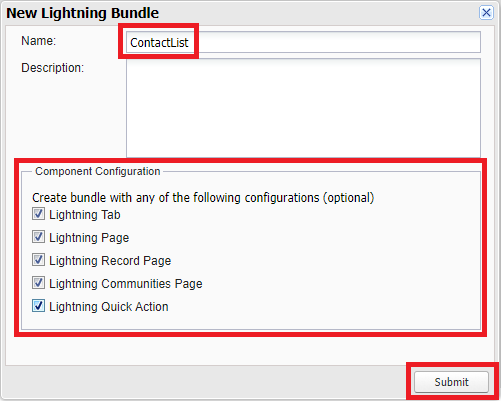
- Specify ContactList as the bundle name and click Submit
- Implement the component as follows:
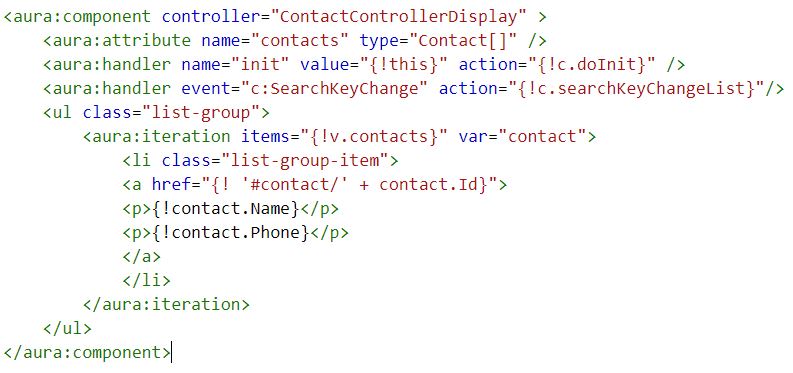
Code Highlights
The contacts attribute is defined to hold the list of Contact objects returned from the server.
The init handler is defined to execute some code when the component is initialized.
That code (doInit) is defined in the component's client-side controller (you'll implement the controller in the next step).
Click File | Save to save the file.
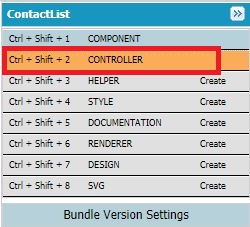
Step - 3 : Creating ContactList.js Controller
1. Click CONTROLLER
2. Implement the Code as Follows

3. Click on Save
Step - 4 : Creating ContactDetail Component
1. In the Developer Console, click File | New |Lightning Component.
2. Implement the Code as Follows

3. Click on Save
Step - 5 : Creating ContactDetail Controller
1. Click on Controller
2. Implement the Code as Follows

3. Click on Save
Step - 6 : Creating ContactDetail CSS Style
1. Click on STYLE
2. Implement the Code as Follows

3. Click on Save
Step - 7 : Creating SearchKeyChange Event
1. Click on File | New | Lightning Event

2. Enter Name as SearchKeyChange
3. Implement the code as follows

4. Click on Save
Step - 8 : Creating SearchBar Component
1. Click on File | New | Lightning Component
2. Enter Name as SearchBar
3. Implement the Code as Follows

4. Click on Save
Step - 9 : Creating SearchBar Controller
1. Click On Controller
2. Implement the Code as Follows

3. Click on Save
Step - 10 : Creating ContactList Application
In this module, you create the ContactListApplication Lightning Application and we will use Bootstrap to define a basic layout for the application.
What you will learn
- Create a Lightning Application in the Developer Console
- Use Static Resources in a Lightning Application
- Preview your Lightning Application in the browser
- In the Developer Console, click File | New | Lightning Application. Specify ContactListApplication as the bundle name and click Submit
- Implement the application as follows:

3. Click on Save and Update Preview to Run the Application.